Salted Caramel Pudding

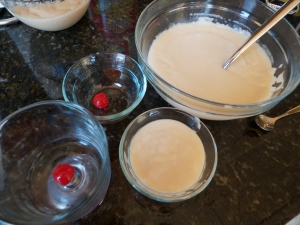
I was remembering the good ol’ days this past week, when I would open the fridge and find a chocolate pudding waiting there for me, complete with a maraschino cherry in the bottom. That was how my mom made pudding special. I couldn’t wait to get through all the chocolate to find the cherry. Since I’ve been having this love affair with salted caramel for the past year, I thought it was time to make a salted caramel pudding, something Jello-O can’t do better than me.

Let me give you a tip – don’t use skim, 1%, 2% or anything other than WHOLE MILK. You need the real deal, or your pudding will not be pudding. It will be milk. It will not thicken. Also, if you buy one ridiculous pantry item, let it be fleur de sel. I’ve found more uses for this salt than any other ingredient I have ever used.
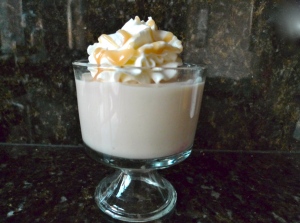
This concoction is lick-the-bowl delicious and something you should definitely savor, but I would be lying if I said I worked through it any slower than in my childhood, trying to get to that cherry on the bottom [still]. Make this now and thank me later.

Ingredients:

  • 1 cup sugar
  • 1/4 cup water
  • 3/4 cup heavy whipping cream
  • 3 tablespoons unsalted butter
  • 1 teaspoon fleur de sel (or kosher salt), plus more for garnish
  • 3 cups whole milk
  • 1/4 cup cornstarch
  • maraschino cherries for bottom of pudding dishes

How To:

To make the caramel sauce, stir sugar and water just until combined in a heavy bottomed small saucepan over medium heat. Stop stirring, and heat to a boil. Watch carefully until the mixture turns to a golden/amber color, remove from heat and stir in whipping cream. Once combined, place over low heat to make sure everything is liquid and there are no sugar chunks. Remove from heat and stir in butter and salt until combined. Transfer to a bowl to cool.  One cup will go into the pudding, reserve the rest for garnish (or ice cream).

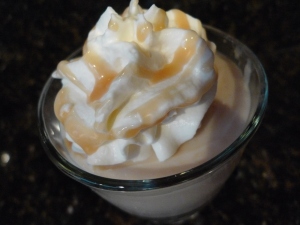
Place one maraschino cherry into each of 4 individual serving dishes (you may need more or less serving dishes, depending on the size). To make the pudding, combine cornstarch and milk in a double boiler or heavy bottomed medium saucepan. Place over medium heat and stir using a heat proof rubber spatula (or whisk) to break up any globs. Mixture will thicken after 15 to 20 minutes. Once milk coats the back of a spoon,  add 1 cup of the caramel sauce and stir. Once mixture is thickened, just another few minutes, transfer to a bowl. At this point, you can process through a sieve to get rid of any lumps. Pour into individual serving dishes and refrigerate for at least 30 minutes to 1 hour. Garnish with whipped cream (I’m partial to ready whip with pudding…it’s a childhood memory thing), a drizzle of the reserved caramel sauce, and a sprinkle of fleur de sel.

Carrot Cake with Cream Cheese Frosting

After several failed recipes, I finally made something I can blog about. Carrot cake.
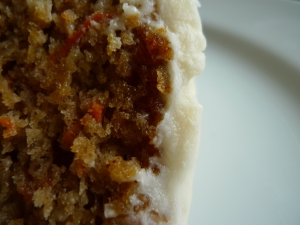
I could probably eat anything with cream cheese frosting, but this cake is something I would consider eating all on its own.
It’s moist, sweet, and I can tell myself it’s healthy; it has carrots. I suggest you tell yourself the same.
Carrot Cake with Cream Cheese Frosting
Ingredients:
  • 3 eggs
  • 3/4 cup buttermilk
  • 3/4 cup vegetable oil
  • 1 1/4 cups white sugar
  • 2 teaspoons vanilla extract
  • 2 teaspoons ground cinnamon
  • 1/4 teaspoon salt
  • 2 cups all-purpose flour
  • 2 teaspoons baking soda
  • 2 1/2 cups shredded carrots
  • 3/4 cup flaked coconut
  • 1 (8 ounce) can crushed pineapple with juice
  • 2/3 cup raisins

for the frosting:

  • 1/2 cup unsalted butter
  • 1 (8 ounce) package cream cheese
  • 1 teaspoon vanilla extract
  • 4 cups confectioners’ sugar

How To:

Preheat oven to 350 degrees. Grease two 8- inch baking pan. Set aside.
In a large bowl, mix together sugar, oil, eggs, vanilla and buttermilk. Stir in carrots, coconut, vanilla, and pineapple. In a separate bowl, combine flour, baking soda, cinnamon, and salt; gently stir into carrot mixture. Spread batter into prepared pan.
Bake for 55 minutes or until a cake tester comes out clean. Remove from oven and cool in pan for 10 minutes. Remove from pans and cool completely on a wire rack.
In a medium mixing bowl, combine butter, cream cheese, vanilla, and confectioners sugar. Blend until creamy. Frost cake as you would any two layer cake: begin with first layer. Place 1/4 of cream cheese frosting on top and spread across top of cake. Add second layer and place remaining frosting on top, working frosting down sides of cake and around. Smooth entire surface (or create waves if you want that look).

Festive Garland Blondies

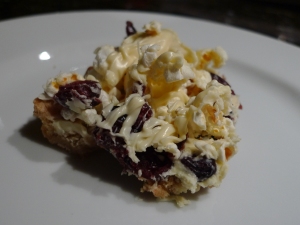
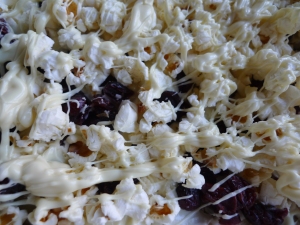
I do love blondies – a rich vanilla brownie – and I love them even more with white chocolate. I thought my recipe needed to stop there, but I was wrong (so, so wrong). There is so much more to add like dried cranberries, popcorn, and then some more dried cranberries, thanks to my enlightenment from the Whole Foods “Whole Deal” booklet.

I think back on my days of just plain blondies with white chocolate, and think how naive I was. To think that was all there is.

I changed up the recipe from the Whole Foods version because I like a thicker blondie base. There are also some keys in the recipe to helping make the added toppings stick that I’ve included below. Tis the time of year for Festive Garland Blondies. *teaser* next recipe will be a brownie version!

Festive Garland Brownies, adapted from the Whole Deal newsletter

Ingredients:

  • 1 sticks plus 2 tablespoons unsalted butter, melted
  • 2 cups all-purpose flour
  • 1 teaspoon baking powder
  • 1 teaspoon kosher salt
  • 1/4 teaspoon baking soda
  • 1 1/2 cups dried cranberries, divided
  • 1 1/2 to 1 3/4 cups white chocolate chips or chunks, divided
  • 2 cups light brown sugar
  • 2 eggs
  • 1 cup salted popcorn (from a microwave bag)

How To:

Preheat oven to 350 degrees.

Spray a 9 inch square baking pan with non-stick spray, set aside. In a medium bowl, whisk together the flour, baking powder, salt and baking soda. Add 3/4 cup cranberries and 1/2 cup of the white chocolate chips or chunks and toss to coat. In a large bowl, beat together the butter and sugar with a hand mixer until fluffy. Add egg and beat until incorporated. Add flour mixture and beat until just combined.

Spoon batter into prepared pan and smooth top. Bake until just cooked through and golden brown, about 20 minutes. Set aside for 5 minutes (but you want to work with it still warm so topping will stick). Melt remaining white chocolate. Spread 2/3 of the melted chocolate over bars and immediately scatter remaining cranberries and popcorn over the top, pressing down gently to help stick. Drizzle remaining chocolate over bars. Set aside until chocolate sets, about 15 minutes. Cut into squares and serve. Store in a sealed container for a few days.

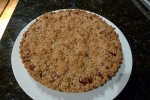
Bavarian Apple Torte

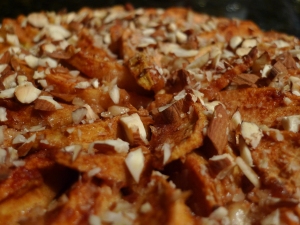
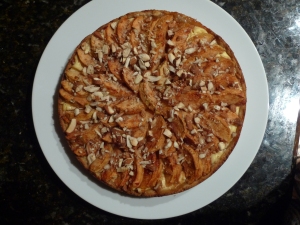
Another mommy recipe (by which I mean a recipe from my mother) with a few of my touches. Not that it wasn’t perfect to start with.

I love this dessert/breakfast/snack. It’s perfect for fall, and a great “thing to have on hand” when you are going to be having many guests or if you are in need of a hostess gift.

The ingredients list is not long and you will find you have most in your pantry. The prep is a cinch and before you know it, your house will be smelling “perfectly wonderful appley baking like” (something that was actually said upon opening our front door).

I feel I am using the term perfect way too easily here, but Bavarian Apple Torte is just, well, kind of perfect.

Ingredients:

crust:

  • 1/2 cup unsalted butter
  • 1/3 cup sugar
  • 14 teaspoon vanilla
  • 1 cup flour
  • 1/4 teaspoon salt
cream filling:
  • 1 8-ounce package cream cheese, softened (can use Neufchatel cheese)
  • 1/4 cup sugar
  • 1 egg
  • 1/2 teaspoon vanilla extract
topping:
  • 1/3 cup sugar
  • 1/2 teaspoon cinnamon
  • pinch nutmeg
  • 4 cups peeled, cored and sliced apples (about 2 large apples – use a baking apple such as Mcintosh or Empire
  • 1/4 cup roughly chopped almonds

How To:

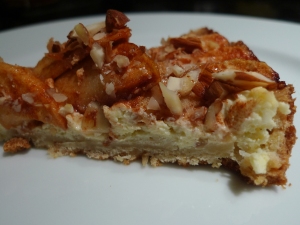
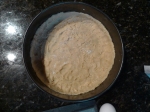
Preheat oven to 450 degrees. For crust, cream the butter and sugar. Beat in vanilla. Gradually blend in flour and salt. Mixture will be crumbly. Pat onto the bottom of a 9-inch spring form pan. Bring crust up about 1 1/2 inches high around the sides.

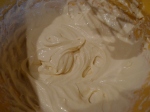
For the cream cheese filling, beat together the cream cheese and sugar. Add egg and vanilla, blending well. Pour into pastry lined pan and spread filling to the edges.

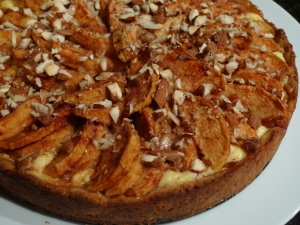
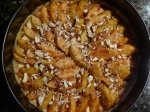
For topping, combine the sugar, cinnamon and nutmeg. Toss apples in the mixture. Place over cream layer in a domino pattern (or just spoon them on top – totally fine. Tastes the same). Sprinkle with nuts.

Bake for 10 minutes at 450 degrees. Reduce oven temperature to 400 degrees. Continue baking for 25 minutes. Loosen torte from the rim of the pan. Cool before removing and serving. I prefer it chilled.

Caramel Apple Bars

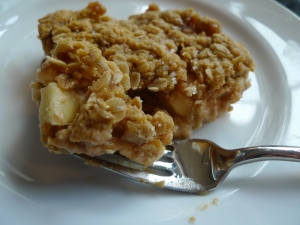
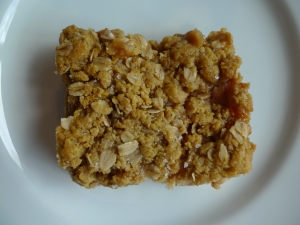
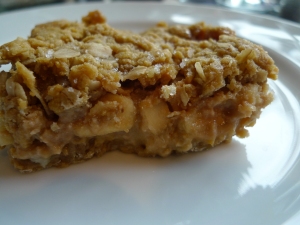
Since my experiments in making caramel apples with homemade caramel all backfired, I found a new method of delivery for caramel apples – in the form of bars. This recipe brings all those flavors into an oat filled, crunchy, gooey, yummy little (or big) square.
I find eating caramel apples to be a little difficult. The caramel gets all over, I have the tendency to bump the apple into my chin, and the stick in the middle is hard to navigate. At the end, the apple often falls off into pieces.
With bars, there is no mess, no fuss, no muss. They are very sweet and a little bit salty, something lacking in caramel apples unless they had a sprinkling of sea salt (which would be a great addition). And now that I have the ideas flowing, adding peanuts or peanut butter would be awesome in this recipe. Some crunchy chopped peanuts on the top or using peanut butter instead of butter in the crust…I might have to revise this recipe at some point, but for now the caramel and apples work mighty well.
Ingredients:
  • 3/4 cup packed brown sugar
  • 1/2 cup butter, softened
  • 1/4 cup pumpkin puree
  • 1 cup all-purpose flour
  • 3/4 cup whole wheat pastry flour
  • 1 1/2 cup quick cooking oats
  • 1 (14 ounce) package individually wrapped caramels, unwrapped (or 1 recipe homemade caramel)
  • 1 teaspoon salt
  • 1/2 teaspoon baking soda
  • 4 1/2 cups peeled, cored and diced apples (small dice)
  • 1 tablespoon lemon juice
  • 3 tablespoons all-purpose flour
  • sea salt or fleur de sel for sprinkling (as much or as little as you want, I used about 1 1/2 teaspoons)
for caramel:
  • 1 stick unsalted butter butter
  • 1/2 cup light corn syrup
  • 3/4 cup half and half
  • 1 cup brown sugar
  • 1/2 teaspoon vanilla
  • 1/2 teaspoon sea salt or fleur de sel
How To:
If you are making the caramel, take out an 8″ X 8″ glass baking dish. Your caramel will cool here. Dice butter into even sized cubes. Add sugar to a medium sauce pan and add 3 tablespoons water. Cook over medium heat until sugar is dissolved. Add butter and stir slowly until combined. Add corn syrup and half and half; mix.

Cook and stir on medium for one minute, then to medium to high heat until boiling. Once boiling, clip on a candy thermometer. Reduce heat to medium and keep a steady boil, stirring occasionally. Watch the temperature – you want to reach 240 degrees. Remove from heat, add vanilla and salt and stir. Pour into baking dish and set aside.

For the bars, preheat oven to 400 degrees. In a large bowl, cream together the brown sugar, butter and pumpkin until smooth. Combine flours, oats, baking soda and salt; stir into the creamed mixture until well blended. Set aside 2 cups of this mixture. Press the rest of the mixture into the bottom of an ungreased 9″ x 13″ baking pan.
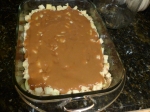
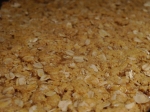
In a medium bowl, toss diced apples with lemon juice. Add the 3 tablespoons flour and toss again. Spread apple mixture evenly over the crust. If caramel has set at all, microwave for 10 to 20 seconds, or until pourable. Spread over apple layer. Sprinkle the reserved oat mixture over the top of the caramel layer. Press down lightly. Sprinkle with sea salt or fleur de sel.
Bake for 25 to 30 minutes, until the top is golden brown and the apples are tender. refrigerate and cut when room temperature or cool. Refrigerate left over bars.
Peach Pie

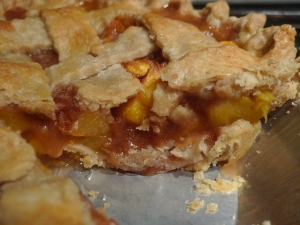
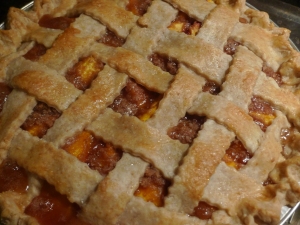
My inner Southern bell wanted to make an appearance this week in the form of peach pie.  Although peaches are great on their own this time of year, peach pie is a fantastic way to use them as well. They soften and sweeten even more, and when blanketed in buttery crust they become dreamy.

This recipe incorporates a crumble, and I am not sure if anyone can turn down a crumble, consisting of flour, butter, sugar, and some spice. Everything nice.

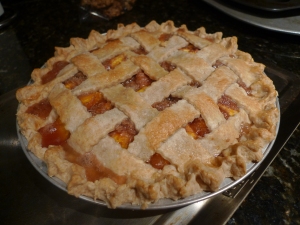
A lattice crust seems like it might be a tough task, but it’s actually not bad. You just weave the pie crust strips. Crimping the edges…that takes practice and I am not a professional by any means. Just try your best because once you start eating the pie, you’ll forget about what it looks like, whether your crimping is perfect or slightly imperfect.

Ingredients:

for pie crust:

  • 2 1/2 cups all-purpose flour or a mix of all-purpose and whole wheat flour, plus more for rolling
  • 2 sticks unsalted butter, very cold and in a 1/2″ dice
  • 1 teaspoon salt
  • 1 teaspoon sugar
  • 4 to 7 tablespoons water
for pie filling:
  • 1/3 cup all-purpose flour
  • 1/2 to 3/4 cup white granulated sugar
  • 1/2 teaspoon cinnamon
  • 1/4 cup unsalted butter, at room temperature
  • pinch salt
  • 6 to 8 large fresh peaches, pitted, peeled and sliced
  • 1/4 teaspoon almond extract (optional)
  • 1 egg, whisked
  • 1 tablespoon water
  • course sugar for topping

How To:

For pie crust, place flour, salt, and sugar in a food processor and pulse to mix. Add butter and mix until mixture resembles coarse meal, with pea size granules of butter. Add ice water 1 tablespoon at a time, pulsing until mixture begins to clump together. The dough will be ready if you pinch some and it holds together. If the dough doesn’t hold together, add a little more water and pulse again.

Remove dough from processor and place in a mound on your work surface. Slightly knead dough into 2 disks, but do not over knead. Wrap disks in plastic wrap and refrigerate for at least 1 hour or up to 2 days.

When ready to roll out dough, remove crusts from the refrigerator. Let sit at room temperature for about 15 minutes in order to soften. Roll out on a lightly floured surface (with a lightly floured rolling pin) to fit a 9″ pie plate, about 1/8″ thick. Set aside.

Preheat oven to 350 degrees.

For the filling, in a medium bowl, use a fork to combine flour, sugar, cinnamon and butter. Mix until crumbly.

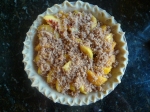
Mix almond extract with peaches gently to coat. Spoom half of the peaches into the pie crust. Top with half of the crumbly sugar mixture. Layer more peaches and more crumble mixture. Top the pie with second pie crust by making a lattice top. Roll out pie dough and create slices with a pastry wheel or knife (you can also roll out dough as a double crust, cut four slits and skip the lattice).  Weave slices on the top of the pie to create lattice and crimp edges to seal. To crimp edges, pinch thumb and index finger with index finger on opposite hand.

Combine the whisked egg and tablespoon water. Brush the top with egg wash and sprinkle with coarse or granulated sugar. Bake on the center rack in the oven for 40 minutes to 1 hour. Pie is done when crust is golden brown and peach pie filling is bubbling.  Allow to cool slightly. Serve warm with whipped cream or ice cream.

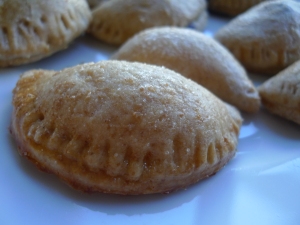
Mini Pies

Sometimes you want a pie that fits in your pocket. No? Just me then?
If it’s just me in this category then what will win you over is their cuteness. You’ll be forced to pick one up and call it your own.
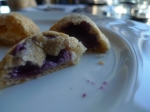
Mini pies, filled with a creamy, cheesy, sweet fruit filling. The crust is buttery and light (yes, pie crust can and should be both) and the topping of nothing more than sugar gives them an added sweet crunch.
You can make the pie crust a few days in advance or use refrigerated pie crust. Just like a cupcake is meant for one person, a mini pie is meant for you and you only.
Ingredients:
for crusts: (can also use 2 9″ refrigerated pie crusts, bringing to room temperature before rolling out)
  • 2 1/2 cups flour, plus extra for rolling (I used a mix of all-purpose and whole wheat pastry flour)
  • 2 sticks (1 cup) unsalted butter, very-cold, cut into 1/2 inch cubes
  • 1 teaspoon salt
  • 1 teaspoon sugar
  • about 6 tablespoons ice water
for filling:
  • 1/2 cup mascarpone cheese, at room temperature
  • 1/4 cup ricotta, can use non-fat or regular
  • 2 tablespoons sugar, plus extra for sprinkling
  • 1/2 teaspoon cornstarch
  • 1 teaspoon lemon juice
  • 1 teaspoon lemon zest
  • 1/4 cup fresh blueberries
  • 1/4 cup peeled, diced peach
  • 1 egg, beaten
*can also use diced strawberries, cherries, raspberries, etc. 

How To:

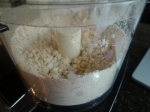
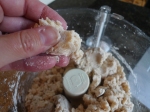
Combine flour, salt, and sugar in a food processor; pulse to mix. Add butter and pulse until mixture resembles coarse meal and there are pea size pieces of butter. Add ice water 1 tablespoon at a time, pulsing until mixture just begins to clump together. If the dough comes together when you pinch some, it’s ready. If the dough doesn’t hold together, add a little more water and pulse again.

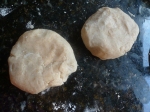
Remove dough from machine and place in a mound on a work surface.  Knead the dough just enough to form 2 discs; do not over-knead. Wrap each disc in plastic wrap and refrigerate at least 1 hour or up to 2 days. When ready to make pies, remove one crust disk from the refrigerator at a time to work with. Let it sit at room temperature for 15 minutes. This will allow the dough to soften for better rolling out.

Preheat oven to 350 degrees. Line a large baking sheet with parchment paper. Set aside.

In a small bowl, mix together the cheese, ricotta, sugar, cornstarch, lemon juice, and lemon zest until smooth. Set aside.

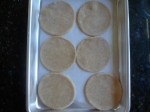
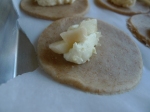
Roll out pie dough with a floured rolling pin to 1/8″ thickness. Using a large (something like a 3 1/2″) round cookie cutter, cut the dough into as many circles as you can. I had about 20 circles. Place the dough circles on the prepared baking sheet. Using a pastry brush, brush the edges of the dough circles with the beaten egg. Place about 1 1/2 teaspoons of the cheese mixture in the middle of the dough. Top with 3 blueberries or 3 to 4 pieces of diced peach. Fold the dough in half, enclosing the filling and press down on the edges to seal. Using a fork, gently crimp the sealed edges. Bake for about 20 minutes or until lightly browned. Repeat process with the rest of the pie dough. Let cool slightly; serve warm. Or piping hot. Or cold. They are good at every temperature.

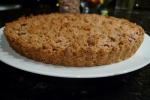
Plum Tart

Plums were on sale and I found them to be quite cute, to the point that I had to buy a lot of them. I wouldn’t want to see what happens if I were to walk into a pet store.
They looked great in my fruit bowl, but I realized I had to find a way to use them soon, or they wouldn’t be looking so nice. A plum tart was a great solution and Ina Garten had a great sounding recipe. I’m going to be honest and say I wasn’t in love when I tried it. Let the tart rest overnight, and eat it the next day with whipped cream. A great, great dessert.
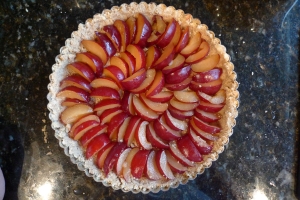
The plums are tart and sandwiched between layers of nutty and hearty crust, creating something sweet. Anything that comes out of a tart pan just looks fancy, so making this for dessert might make you feel like you’re fine dining, at home.
Ingredients:
  • 1 cup all-purpose flour
  • 1 cup whole wheat pastry flour
  • 3/4 cup finely chopped walnuts
  • 3/4 cup light brown sugar, lightly packed
  • 8 tablespoons cold unsalted butter, diced
  • 1 egg yolk
  • 2 pounds firm, ripe plums, pitted and sliced lengthwise, quarters or sixths
How To:

Preheat the oven to 400 degrees. Stir the flours, walnuts and sugar in a large bowl. Cut in the butter and the egg yolk. Mix by hand (or you can use an electric mixer) until crumbly.

Press 1 3/4 to 2 cups of the crumb mixture in an even layer into the bottom of a 9 1/2″ tart pan. Place the plums in, skin side down, in a spiral pattern (begin at the outside, end in the middle).

Sprinkle the remaining crumb mixture over the plums. Bake for 40 minutes, or until the topping is lightly browned. Let cool for 10 minutes on a wire rack. Transfer tart to a flat place or cake stand. You can eat it at room temperature but I recommend chilling it and serving with whipped cream.

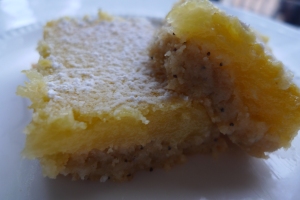
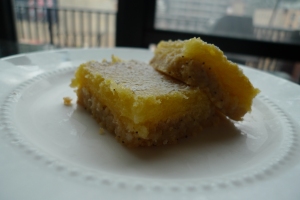
Lemon Bars with a Poppy-seed Crust

When I haven’t seen the sun in days, I need to make something bright to remind me of the sun, thus lemon bars. They are cheery, tart and create happiness like a good dessert should. They remind me of tulips, birds chirping, and that trees do indeed get leaves, and I am able to tell myself, “spring will be here soon…spring will be here soon…” Ugh, it has to be.

The great thing about lemon bars is they are refreshing. It’s like having lemonade on a summer day…but instead it’s having a baked treat on a not so warm day. Same effect. Smile inducing.

I used a combination of whole wheat pastry flour and all-purpose flour because I like to add a lil whole wheat where I can. You can most definitely use all all-purpose flour.

And while lemon Bars can’t give you a tan, they can make you envision sunnier days head.

Ingredients:

  • 2 sticks unsalted butter, at room temperature
  • 1/2 cup granulated sugar
  • 1 cup whole wheat pastry flour
  • 1 cup all-purpose flour
  • 1/8 teaspoon kosher salt
  • 2 teaspoons poppy-seeds
for the filling:
  • 4 extra-large eggs at room temperature
  • 2 1/2 cups granulated sugar
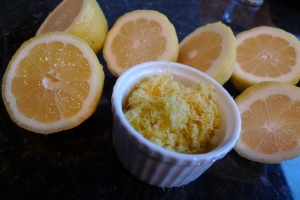
  • 1 tablespoon plus 2 teaspoons grated lemon zest
  • 3/4 cup freshly squeezed lemon juice
  • 2/3 cup flour
  • Confectioners’ sugar

How To:

Preheat the oven to 350 degrees. With a hand mixer, combine the butter and sugar until light and fluffy. On low speed, slowly add the flour, salt, and poppyseeds. Put the dough onto a floured surface and create a ball. Flatten the dough (easier with floured hands) and press it into a 9 X 13 inch baking dish – can be glass, aluminum, ceramic, etc. Build up a small edge on all sides.

Bake the crust for 15 to 20 minutes, until very, very lightly browned. Let cool and leave the oven on.

For the filling, whisk together the eggs, sugar, lemon zest, lemon juice, and flour. Pour over the crust and bake for about 30 minutes. The filling should be set. Leave the bars to cool.

Once bars are cool, cut into squares and dust with confectioners’ sugar by using a sifter.

Raspberry White Chocolate Bars

The song “Raspberry Beret” by Prince came into my head the second I bit into a Raspberry White Chocolate Bar. It didn’t make much sense since these are desert bars and Prince is singing about a girl wearing a raspberry beret (the kind you find in a second hand store…if you know the song). But, it’s a happy song and these bars will put you in a happy mood with or without the out loud sing-along.

The creamy white chocolate layer and fresh raspberries are sandwiched in between sweet oats. Dessert bars are really just layers of flavors, all working in great harmony (like a Prince song).

“Raspberry beret…if it was warm she wouldn’t wear much more…” If this song was named after this bar, it would be “Raspberry Oat Bars…if she eats more, she’ll have to buy bigger pants.”

Ingredients

  • 1 1/2 cups all-purpose flour
  • 1 1/2 cups old fashioned oats
  • 1 1/4 cups sugar, divided
  • 1/2 teaspoon baking soda
  • 1/2 teaspoon salt
  • 3/4 cup cold unsalted butter
  • 2 cups fresh or frozen raspberries
  • 2 teaspoons arrowroot (or 2 tablespoons cornstarch)
  • 2 tablespoons lemon juice
  • white chocolate chips
  • 1 tablespoon milk

How To:

In a medium bowl, mix together the flour, oats, 1 cup of the sugar and baking soda. Add butter and combine with hands or a pastry blender until mixture resembles coarse crumbs. Set aside 2 cups for the topping. Press the rest of the crumb mixture into a greased 13 x 9 inch baking pan.

Melt white chocolate chips in microwave. Heat for 1 minute, stir; heat for 30 second intervals until completely smooth, stirring in between. Spread over the crumb mixture in baking pan.

In a saucepan, combine raspberries, arrowroot (or cornstarch), lemon juice and remaining sugar. Bring to a boil. While boiling, stir for about 2 minutes.  Spread evenly over the white chocolate layer. Sprinkle with the reserved crumb mixture. Bake at 375 degrees for 25 minutes. Oats will be slightly browned. Cool or refrigerate before cutting.