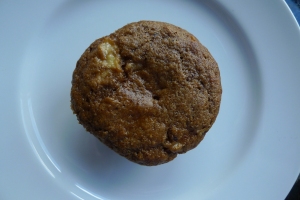
Chunky Monkey Muffins

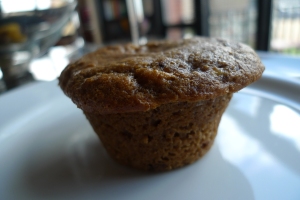
With its title, this recipe had me right away. The term chunky monkey actually means “the object of a chubby chaser’s affection,” (according to the Urban Dictionary) but in my dictionary it means food with bananas, chocolate, and peanut butter combined.

These muffins are actually most healthy, but don’t let that turn you away. They taste decadent and hearty, perfect for a chilly morning when its too late in the season for oatmeal and the berries have yet to arrive.

Ingredients:

  • 1 1/4 cups whole-wheat pastry flour
  • 1/2 cup all-purpose flour
  • 3/4 cup packed brown sugar
  • 1 heaping tablespoon cocoa powder (I used Hershey’s)
  • 2 teaspoons baking soda
  • 1/4 teaspoon salt
  • 2/3 cup semisweet chocolate chips (or dark chocolate chips)
  • 6 ounces low-fat vanilla yogurt
  • 2 medium overripe bananas, mashed
  • 1 egg
  • 1 teaspoon vanilla extract
  • 2 tablespoons vegetable oil
  • 1/4 cup milk
  • 1/3 cup smooth peanut butter

How To:

Preheat oven to 350 degrees. Line a 12-cup muffin tin with paper liners. Coat liners with cooking spray and set aside.

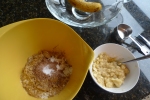
Combine flours, brown sugar, cocoa powder, baking soda and salt in a large mixing bowl.

Mix together the yogurt, bananas, egg, vanilla extract, oil, and milk in a separate bowl until thoroughly combined (but banana chunks are ok).

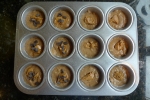
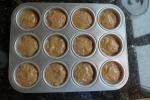
Fold the wet mixture into the dry mixture until just combined. Spoon the prepared muffin cups 1/2 full. Add 1 teaspoon peanut butter on top, then sprinkle with a few chocolate chips. Fill up the cups with more batter until 3/4 full. Bake for 20 minutes or until the tops of the muffins look dry and they spring back if touched. Allow to cool for several minutes, then take muffins out of tins and place on a wire rack to fully cool. Let the affection begin, in the form of noshing.

Chocolate Peanut Butter Sandwich Cookies

I’ve always loved oreos and the base recipe for these cookies is a homemade oreo. I love peanut butter though, and thought it should be included in this party. That’s right, this is a party in a cookie. Lucky for you, you are invited.

Something I wished in an oreo but was always missing was a soft wafer. I’ve never liked a crunchy cookie. I like to think my cookies have perpetually just been baked, and still soft from the oven. Crunchy cookies somehow translate to stale in my mind (but certain cookies should be crunchy, like gingersnaps and nila wafers…I digress).

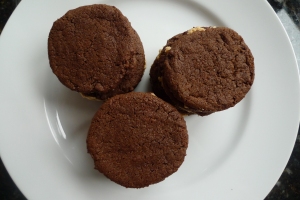
The mix of a soft chocolate cookie and a smear of peanut butter love makes these cookies pretty much irresistible in my book. Join the cookie party by baking up a batch.

Ingredients:

for the cookies:

  • 1 1/4 cups all-purpose flour
  • 1/2 cup unsweetened Dutch process cocoa
  • 1 teaspoon baking soda
  • 1/4 teaspoon baking powder
  • 1/4 teaspoon salt
  • 1 1/4 cups sugar
  • 1 1/4 sticks unsalted butter, at room-temperature
  • 1 egg

for the filling:

  • 1/4 cup vegetable shortening
  • 1/4 cup smooth peanut butter
  • 2 cups sifted confectioners’ sugar
  • 1 teaspoons vanilla extract

How To:

Preheat oven to 375 degrees.

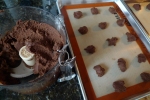
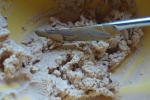
In a food processor mix the flour, cocoa, baking soda, baking powder, salt and sugar. While on low speed (or pulsing) add the butter, then the egg. Continue to process until the dough comes together.

Using a cookie scoop (this REALLY helps create cookies that are the same size) or a teaspoon, drop rounded balls of dough on a lined baking sheet (use a silpat or parchment paper) about 2 inches apart. With moistened hands, flatten each ball. Bake for 8-10 minutes, rotating once to allow for even baking. Let the cookies cool on baking sheets for several minutes, then transfer them to a wire rack.

For the cream filling: with an electric mixer, combine shortening and peanut butter in a medium bowl on low speed. Gradually beat in the sugar and vanilla. Turn the mixer on high speed and beat a few more minutes until filling is light and fluffy.

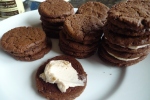
To create the sandwich cookies, use a butter knife to spread 1-2 teaspoons on one half of the cookies, flat side up. Place another cookie (of similar size) on top and smoosh lightly down to spread the filling. Continue until all the cookies have been made into delicious sandwiches. Makes 25-30 sandwich cookies.

Asian Chicken Salad

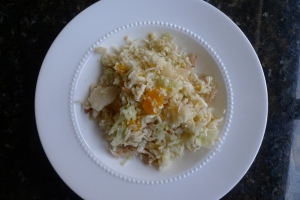
When you step outside into what feels like a foggy, hazy oven, a warm meal just doesn’t sound enticing whatsoever. What does sound appealing is a cold salad with crisp veggies and a zingy dressing.

First, there is the cabbage portion. I shred mine in a Cuisinart food prep, but you can definitely buy pre-packaged cole slaw mix (just shredded cabbage but they call it cole slaw mix). Then there is roasted chicken; you can again save time and oven heat if you buy a rotisserie chicken. After that there are the sweet mandarin oranges, the crunchy pea pods (which I actually forgot to even add…good thing they taste great on their own), and water chestnuts. I had some baby bok choy ready to be prepared like diced celery in the salad as well, but it was also left out. Apparently my head is in a haze as well.

Just for good measure there are ramen noodles and to add crunch, slivered toasted almonds. This salad is both refreshing and light, perfect for a spring day that feels like late summer.

Ingredients:

  • 1 head cabbage, shredded or 1 package cole slaw mix
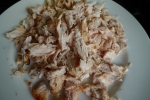
  • 2 – 3 chicken breasts, roasted and shredded
  • 1 can mandarin oranges (save the juice! see below)
  • 1 can sliced water chestnuts, diced
  • 2 packages lightly crushed ramen noodles (throw out seasoning packet)
  • 1/2 cup pea pods (you can also forget this, like I did)
  • 1/3 cup slivered almonds, toasted (just heat in a dry saute pan for several minutes, turning often) and divided
  • salt and pepper to taste
  • 1 cup seasoned rice vinegar
  • 3 tablespoons sugar
  • 1/4 cup mandarin orange juice
  • 1/3 cup vegetable oil

How To:

For the dressing, combine the seasoned rice vinegar, sugar, mandarin orange juice, salt and pepper (you can adjust this later, too). While whisking, add vegetable oil. Set aside.

Toss cole slaw, chicken, mandarin oranges, water chestnuts, pea pods, and crushed ramen noodles. Stir in dressing (re-shake if it separated) and mix, getting all ingredients coated by the dressing. Chill for 20 minutes. When ready to serve, add 1/4 cup slivered almonds and re-toss. Garnish with remaining almonds.

Manti

One of my favorite recipes and one of the best soups ever, is manti. I recently tackled manti because a) I really wanted to eat it and b) my mom and nana always talked about what a process it is, and how much money it sells for at the church bazaar. I wanted to prove them wrong and learn that it is a simple thing to make. Well, I was wrong.

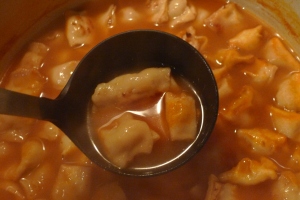
This shouldn’t discourage you from making manti, which is actually the name of the little dumplings (but I also call the finished soup manti). Once you’ve got the bowl in front of you, you’ll soon realize all the work was worth it. And maybe that makes the soup even more satisfying. You can also freeze the manti and have them ready for plumping in the tomato-y broth base on any day you need a comfort serving.

A little background: manti is traditionally made with lamb and beef tiny meatballs, wrapped in a little dough, baked, then plumped up in a tomato chicken broth mixture and served with a tangy yogurt. I used ground chicken, and it turned out great. You can use plain greek yogurt or if you are Armenian, you might be familiar with mazoon (Armenian yogurt).

Ingredients:

  • 1 cup warm water
  • 1 egg
  • 1 1/2 tablespoons melted butter
  • 1 tablespoon olive oil
  • 1 tablespoon salt
  • 1 pound flour
for the meat mixture:
  • 1 1/2 pounds ground chicken (or sirloin or lamb)
  • 1 cup finely chopped onions
  • 1/2 cup chopped flat parsley
  • 2 cloves finely chopped garlic
  • 1 1/2 teaspoons salt
  • 1 1/2 teaspoons ground pepper
for preparation of the dumplings:
  • 2 sticks butter
How To:

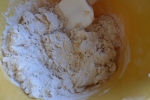
Mix the water and egg together and add melted butter, olive oil and salt, thoroughly incorporating. Add the flour all at once. Spread flour on a work surface (i.e. granite counter or waxclothed table) and knead the dough until all of the flour has been mixed in. Knead dough to become smooth.
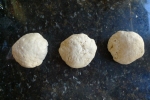
Divide the dough into 3 equal parts and form into balls. Cover with plastic wrap and allow the dough to rest for 30 minutes.
For the meat mixture, combine all ingredients in a large bowl. Don’t over mix. Separate the mixture into 3 equal parts and cover and refrigerate until ready to use.
For the manti, flour your work surface. Roll out one dough ball to 1/8″ thickness, measuring approximately 20″ in diameter. If you think you’ve rolled thin enough, keep rolling until you feel like it just won’t get any thinner. It needs to be really thin. With a pizza cutter or ravioli cutter, cut the dough into 1″ squares. I eyeballed this at first and realize that wasn’t the best method, but it does work.
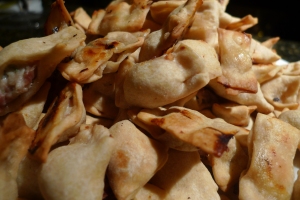
Melt the butter and liberally brush it on a baking sheet. Take a portion of the meat, such as a small dab, and place onto each square. This will be a very small amount. squeeze the ends of the dough together, hiding the meat inside the dumpling and preventing the meat from falling out. Your manti will resemble a canoe. Place manti on the buttered baking sheet, and make sure they do not touch each other. Once you’ve filled the tray, lightly butter the tops of each manti. Continue with the remainder of meat and dough.
Bake in a preheated 375 degree oven until golden brown (about 15-20 minutes). Cool on a plate or wire rack. You can freeze manti after baking, and you will want to freeze some because this recipe makes a lot of little mantis. To serve, heat 4 to 6 cups chicken broth with 2 tablespoons tomato paste. Add 2 cups manti and allow to plump up. Serve with a dollop of plain yogurt.