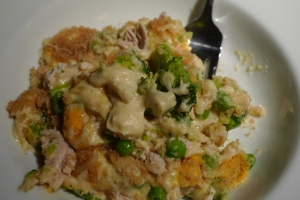
Chicken Broccoli Bake

My mother had two go-to recipes when I was growing up: chicken tetrazzini and a chicken broccoli bake. I find myself craving this staple of chicken and broccoli at those times when I need a plate of comfort. It’s so delicious, it might make it into your weeknight rotation.

Layers of diced chicken, broccoli, creamy chicken soup and curry are the main flavors. Hints of fresh lemon and tangy mayonnaise pull it together along with a cheesy, crunchy top. It’s easy and can be made ahead of time, so all you need to do is pop it in a preheated oven. And no canned soup in this version – below is a simple recipe to make up a batch of cream of chicken soup with items in your pantry.

Ingredients:

for the soup

  • 1 1/2 cups low sodium chicken broth
  • 1/2 teaspoon poultry seasoning
  • 1/4 teaspoon onion powder
  • 1/4 teaspoon garlic powder
  • salt and pepper to taste
  • dash of paprika
  • 1 1/2 cups milk, divided
  • 1/2 cup flour

for the bake

  • 16 ounces frozen broccoli
  • 1 teaspoon lemon juice
  • 1/2 teaspoon curry powder
  • 4 cups cooked chicken breast, diced (I sometime cheat and use a rotisserie chicken)
  • 2 cups cream of chicken soup (recipe above)
  • 1 cup mayonnaise
  • 1/2 cup shredded cheddar cheese
  • 1/2 cup bread crumbs
  • 1 tablespoon unsalted butter

How To:

In a medium saucepan bring the chicken broth, 1/2 cup of milk, and all the seasonings to a boil for about two minutes.

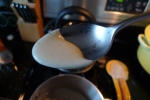
Whisk together the remaining 1 cup of milk and flour in a bowl. Add to the boiling mixture and turn down heat slightly. Continue whisking briskly until mixture thickens. Test to see if it needs more salt and pepper, adding more if necessary. Remove from heat and let cool slightly.

Preheat oven to 350 degrees. Cook broccoli in boiling water until bright green. Transfer to a colander in the sink and spray with cold water; drain. Arrange broccoli in a greased or non-stick sprayed 12 X 9 inch baking dish. Put cooked chicken over the broccoli.

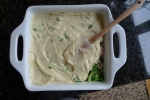
In a separate bowl, combine soup, mayonnaise, lemon juice and curry powder. Pour mixture over the chicken layer. Sprinkle with cheese. Top with bread crumbs and dot with butter. At this point you can refrigerate until ready to use, or place in the oven for 3o minutes until crumbs are golden and cheese is bubbly.

Serves 6-8.

Coconut Cupcakes with Candied Mango

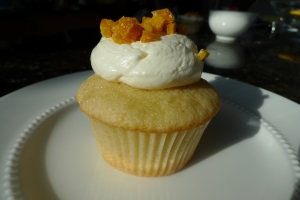
I was taken on a mini vacation courtesy of Coconut Cupcakes with Candied Mango. I’d really like to go back and all I need to do is whip up another batch. No bathing suit required; in fact, its frowned upon.

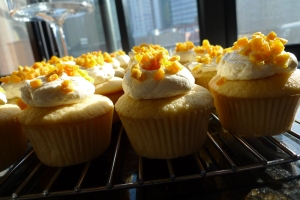
The batter is light and fluffy and the frosting follows suit. Candied mango is something better than the icing on the cake. It is a little tropical boost on days when it’s not quite spring and it’s definitely not summer.

The taste of coconuts, rum and vanilla will transport you to a beach (if you’re not already on one). I hear steel drums when I bite into one…

Ingredients:

  • 1 1/2 cups self-rising flour
  • 1 1/4 cups all-purpose flour
  • 2 sticks (1 cup) unsalted butter, softened
  • 2 cups sugar
  • 4 large eggs, at room temperature
  • 3/4 cup light coconut milk
  • 1/4 cup rum (optional, instead you can use an additional 1/4 cup light coconut milk)
  • 1 teaspoon vanilla extract (can also use a vanilla bean if you want the vanilla flecks)

for the Coconut Buttercream Frosting and Candied Mango:

  • 4 large egg whites
  • 1 cup granulated sugar
  • 1 pinch salt
  • 4 sticks unsalted butter (1 pound), softened, but still cool
  • 1/4 cup cream of coconut or 1/4 cup sweetened condensed milk with 1 teaspoon coconut extract
  • 1 teaspoon coconut extract
  • 1 teaspoon vanilla extract
  • 1/2 cup finely diced dried mango
  • 2 tablespoons raw sugar

How To:

Preheat oven to 350 degrees. Line 2 (1/2 cup-12 capacity) muffin tins with cupcake papers.

In a small bowl, combine the flours and set aside. In a large bowl, cream the butter until smooth. Add the sugar and beat until light and fluffy. Add the eggs, one at a time, and beat well after each addition. Mix in vanilla. Add 1/3 of the dry ingredients, followed by 1/3 of the milk. Repeat process twice, without over beating mixture. You just want the ingredients incorporated. Scrape down the batter in the bowl and make sure batter is blended. Using an ice cream scoop or a small ladle, spoon the batter into cupcake liners, to about 3/4 full. Bake for 20 to 25 minutes, until a cake tester comes out clean.

Cool the cupcakes in tins for 10 minutes. Remove the cupcakes and cool completely on a wire rack.

For the Buttercream Frosting: Combine whites, sugar, and salt in bowl of standing mixer. Set the bowl over a saucepan of barely simmering water  (about 1 1/2 inches deep). Whisk until mixture is opaque and warm to the touch. It should register between 120-130 degrees on a candy thermometer, about 2 minutes.

Using a potholder, transfer the bowl to the mixer stand. Fix whisk attachment and beat mixture on high speed until whites are glossy and sticky, about 8 minutes. Meanwhile, cut each stick of butter into 6 pieces. Reduce speed to medium-high and beat in butter 1 piece at a time. If mixture is curdling a little, don’t worry. It will be fine once you add the next ingredients. Add cream of coconut/sweetened condensed milk and coconut and vanilla extracts. Stop mixer to scrape down sides. Continue to beat at medium-high speed until frosting is fluffy, about 1 minute.

Put your pastry bag (fitted with any tip you like, or do what I did and cut a hole after you fill it) into a tall glass and fold top over the sides of the glass. This is so you can put the frosting in without also holding the bag. Fill bag with frosting and tie top. You can also spread frosting on the cupcakes with a knife or frosting spatula.

For the candied mango: combine diced dried mango with 2 tablespoons raw sugar in a plastic bag. Make sure mango pieces are coated with sugar crystals.
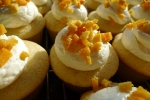
Pipe frosting onto cupcakes and sprinkle with the candied mango. Enjoy!
I was taken on a mini vacation courtesy of these Coconut Cupcakes. I’d really like to go back there, and all I need to do is whip up another batch. No bathing suit required, in fact, its frowned upon.

Chicken Fajita Soup

I decided it was time for a fiesta. No reason really, I just felt like making something to help the transition from winter to spring get here faster (as if making mexican food would do the trick). Seems to have worked as the forecast says temperatures in the 60s later this week.

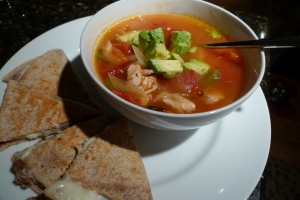
Chicken Fajita Soup is chicken fajitas in a bowl. Add some fun garnishes and you have a one dish meal. No taking out 5+ bowls for all the “stuff” or fussing to make your own fajita (picture an infomercial where everything goes wrong before you try the chicken fajita soup invention). Just a bowl and you, and perhaps some quesadillas on the side.

It’s spicy, salty, and perfect for this time of year- lower in calories and fat than most winter soups. After all, spring is around the corner and that means summer will soon follow…and your bathing suit.

Ingredients:

  • 1 tablespoon extra-virgin olive oil
  • 1 1/2 pounds chicken tenders
  • 1 tablespoon coriander
  • 1 teaspoon cayenne pepper
  • Salt and ground black pepper
  • 1 large onion, quartered and thinly sliced
  • 1 large bell pepper, quartered and thinly sliced
  • 1 (28-ounce) can fire roasted diced tomatoes
  • 1 quart chicken broth
  • 1 bag white corn tortilla chips
  • Several slices pepper Jack cheese (or shredded)
  • 1 avocado
  • 1 lime, juiced
  • 1/4 cup fresh cilantro leaves, chopped
  • sour cream

How To:

Pour olive oil in a large dutch oven over medium heat. Add chicken and begin to brown. Add coriander, salt and pepper to taste, onions, and bell pepper.

Cook 8 to 10 minutes, stirring frequently. Remove chicken and shred or dice. Place back in pot. Add the tomatoes and stock.  Heat for an additional 10 minutes or longer.

When ready to serve, crush 1/4 cup tortilla chips per bowl. Top the chips with some of the diced cheese. Dice the avocado and toss with lime juice. Ladle soup into the bowls, on top of the chips. Garnish with sour cream, avocado, cilantro and additional cheese.

Ice Box Cake

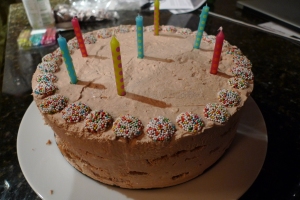
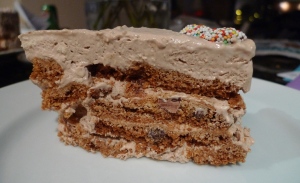
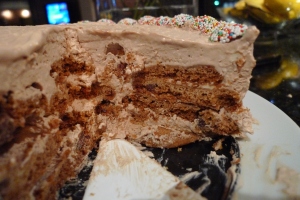
Sometimes an ordinary cake will not do. You need other things like cookies, whipped cream, chocolate and coffee all mixed into one. It may not be a pretty cake, but it’s got a lot of flavor and personality.

An Ice Box Cake is supposed to have more pronounced layers but I got a little jittery while applying the whipped cream layers, worried I was going to run out. No matter- the cake still tasted like cookies and whipped cream should. Really really good.

Although extraordinary, you don’t need a celebration to make this cake, since at its base it’s really is just cookies and whipped cream. No frosting here, no actual cake. Somehow that might make you feel more inclined to make it today, as in now.

Ingredients:

  • 2 cups cold heavy cream
  • 12 ounces cream cheese (can use light)
  • 1/2 cup sugar
  • 1/4 cup brewed coffee or Kahlúa
  • 2 tablespoons unsweetened cocoa powder (I used Hershey’s)
  • 1 teaspoon instant coffee crystals
  • 1 teaspoon vanilla extract
  • 24 ounces chocolate chip cookies, a crunchy, thin variety
  • milk chocolate nonpareils for decoration (as in snowcaps, or you can find ones that are multicolored)

How To:

In a large bowl (you can use an electric mixer fitted with a whisk if you like), with a hand mixer on low start to whip the heavy cream, cream cheese, sugar, coffe or Kahlúa, cocoa powder, coffee crystals, and vanilla. Once it’s combined, begin to slowly increase the speed. You are looking for firm peaks, like fluffed snow on a mountain top..

For assembly of the cake, start by arranging a layer of chocolate chip cookies on the bottom of an 8-inch springform pan. To fill in spaces, break some cookies and fit in-between whole cookies. Spread one-fifth (don’t be stingy) of the whipped cream over the cookies, using a rubber spatula to even. Add another layer of cookies atop the whipped cream, as close together as possible and inseting broken cookies to fill in gaps. Follow with another layer of whipped cream.  Continue to layer until there are five of each, ending with a layer of whipped cream. Smooth over the top and cover with cling wrap. Refrigerate overnight, or if you are on a tight schedule place in freezer for several hours, then refirgerate for a little longer to make sure cookies soften.

Run a sharp knife around the outside of the cake. Carefully remove the sides of the pan. Add decorations –  nonpareils or whatever you like around the edge of the cake. Cut into slices and serve cold.